Launch Your Paid Slack Bot Business: From Idea to First 10 Customers in 45 Days
Launch a paid Slack bot business in 45 days without getting stuck in tutorial hell or over-building. You will validate a real workplace problem first, then build a production-ready Slack app with OAuth, slash commands, and events, add Stripe subscriptions and a self-serve onboarding flow, get listed in the Slack App Directory, and execute a focused launch plan to land your first 10 paying teams at $49-$299/month.
You've got the coding chops and 15 hours a week, but your side projects keep dying in the "maybe someday" graveyard. While you're stuck in tutorial hell, developers just like you are landing their first 5 paying customers in 6 weeks with Slack bots--and they're not smarter than you, they just have a roadmap. This is the exact 45-day system that takes you from "cool idea" to "I just got paid" without quitting your job or becoming a marketing guru overnight.
What Students Say
Hear from learners who have completed this course:
Tomás R.
Operations Lead at a 60-person logistics company
I came in with a vague idea for a “status update bot,” but Section 1 (Days 1–7) forced me to validate a real pain. The customer interview scripts and the “kill criteria” checklist saved me from building the wrong thing. I narrowed it to a bot that automates daily dock schedule confirmations via a slash command and event triggers. Section 2 helped me stop underpricing—I switched from a flat $19 to a $99/team plan with a clear “who it’s for” positioning statement. The most practical win was Section 5’s self-serve onboarding flow. Once I implemented OAuth + the guided setup steps and tied it to Stripe subscriptions, teams could install and pay without a call. In 6 weeks I landed 11 paying teams (8 from my network, 3 from cold outbound), and two upgraded to $199/month after I added role-based permissions from the production-readiness section. I’m not a developer by training, but the course made the build and launch feel like an actual sequence instead of guesswork.
Read more
Adaeze O.
Senior Backend Engineer (freelance), building micro-SaaS products
I’ve built Slack bots before, but they were always “works on my machine” demos. Section 4 (hosting, data, observability, and support) is what finally got me to production quality. I followed the logging/alerting patterns and set up basic observability around event retries and rate limits—those two things alone reduced my support pings dramatically once real teams started using it. Section 3’s breakdown of Slack app foundations (OAuth scopes, events vs. slash commands, and signature verification) also cleared up mistakes I’d been making—especially around handling event acknowledgements quickly to avoid timeouts. After applying the course approach, my bot’s install-to-first-value time dropped to under 5 minutes (measured from OAuth completion to first successful command). I launched a paid “incident handoff bot” and got 10 customers at $149/month within the 45-day window. I’m now rolling into Section 8’s retention plan and already have one expansion to 3 workspaces.
Read more
Fatima A.
Product Marketing Manager at a B2B SaaS company (building a side business)
My weak spot was always the go-to-market side, not the tech. Section 7’s launch plan (Days 40–45) felt like a playbook I could actually execute: the exact outreach sequences, the “problem-first” landing page outline, and the daily targets. I used the positioning worksheet from Section 2 to frame my bot as “a lightweight approval workflow for finance teams,” and it instantly made conversations easier. The Slack App Directory section (Days 36–39) was surprisingly valuable. I didn’t realize how much the trust signals matter—privacy policy, support contact, clear permission explanations, and the install video. After I updated those pieces, my approval went through on the second submission, and directory installs started coming in without me pushing. Result: 12 paying teams in the first month post-approval, mostly at $49/month, plus two annual pre-pays after I implemented the Stripe subscription + trial flow from Section 5. It’s the first time my “side project” has felt like a real product with a real funnel.
Read more
Course Overview
Launch a paid Slack bot business in 45 days without getting stuck in tutorial hell or over-building. You will validate a real workplace problem first, then build a production-ready Slack app with OAuth, slash commands, and events, add Stripe subscriptions and a self-serve onboarding flow, get listed in the Slack App Directory, and execute a focused launch plan to land your first 10 paying teams at $49-$299/month.
Section 1: Pick a Painful Problem and Validate It Fast (Days 1-7)
You will identify bot ideas that fit Slack's strengths, then validate demand through customer interviews and lightweight tests before writing meaningful code. The goal is to leave the week with a clear problem statement, target user, and a narrow MVP scope that people have agreed to pay for.
Learning Outcomes:
- Generate and filter Slack bot ideas using "frequency x pain x authority" criteria
- Run 5-10 customer interviews using scripts and questions that uncover willingness to pay
- Define an MVP spec (one core job-to-be-done, one persona, one success metric) and a clear pricing hypothesis
The biggest lie developers tell themselves is, "I'll build it this weekend, and if it's good, people will find it."
You have likely spent hundreds of hours building tools that were technically impressive but commercially invisible. You understand APIs, webhooks, and deployment pipelines. But the gap between a working GitHub repository and a $5,000 MRR business isn't code--it's validation.
In the Slack ecosystem, the "build it and they will come" strategy is a death sentence. The directory is crowded. To stand out, you need to solve a problem so specific and painful that a team lead is willing to pull out a corporate credit card to fix it.
Days 1-7 are not about opening your IDE. They are about ensuring that when you do open it next week, you are building something that already has a customer waiting.
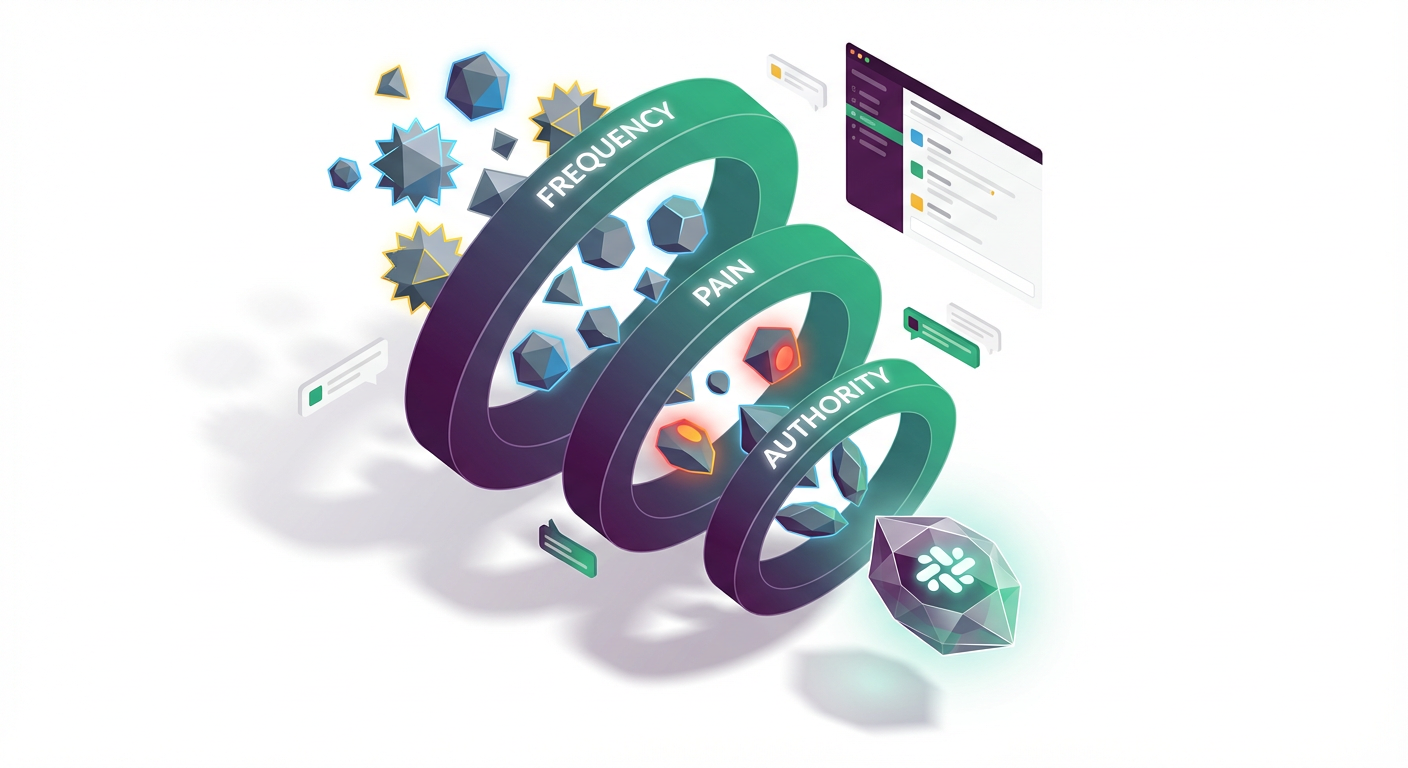
The "Frequency x Pain x Authority" Filter
Most developer side projects fail because they target problems that are annoying but not expensive, or they target users who have no budget. To build a B2B SaaS that generates recurring revenue, your idea must pass the FPA Framework.
If you are brainstorming ideas, run them through this filter immediately:
- Frequency: Does the problem happen daily or weekly? (If it happens once a year, they won't pay a subscription).
- Pain: Does this problem lose the company money, waste engineering hours, or cause compliance risks?
- Authority: Does the person feeling the pain have the authority to buy the tool?
Key Insight: Developers often build tools for other developers (e.g., a "better git commit formatter"). While useful, individual devs rarely have purchasing power. The sweet spot is building for Engineering Managers, Product Owners, or DevOps Leads--people who manage budgets and are evaluated on team efficiency.
Evaluating Bot Candidates
Here is how to distinguish a hobby project from a viable business:
| Criteria | ❌ The "Hobby" Bot | ✅ The "Business" Bot |
|---|---|---|
| Trigger | "It would be cool if..." | "We are losing 5 hours a week doing..." |
| User | Individual contributor | Team Lead / Manager |
| Competitors | 50+ free open-source scripts | 2-3 clunky enterprise tools or manual spreadsheets |
| Pricing | Donation / $2 one-time | $29 - $99 / month |
| Integration | Just sends a notification | Triggers a workflow or captures data |
Conducting the "Mom Test" Interviews
Once you have 2-3 ideas that fit the criteria above, you need to talk to humans. This is uncomfortable for most of us. We prefer async communication and documentation. However, you cannot validate a business idea over email.
Your goal for this week is to conduct 5-10 Zoom calls (15 minutes each) with potential buyers. You are not selling yet; you are investigating.
Who to interview:
- Former colleagues (safest start).
- People complaining about the problem on Twitter/X (search for "Slack" + "annoying" or "hate").
- Users in specific Slack communities (e.g., Rands Leadership, DevOps Chat).
The Script: Do not ask, "Would you use this?" They will lie to be nice. Use this framework instead:
- The Anchor: "You mentioned you struggle with [Problem X]. How are you solving that right now?"
- The Cost: "How much time does your team spend on that manual fix per week?"
- The Commitment: "If I built a bot that automated that workflow and saved you those 5 hours, would you pay $49/month for it?"
Pro Tip: Watch out for "False Positives." If someone says, "That sounds like a great idea," you have validated nothing. If they say, "Why hasn't anyone built this yet? Can I use the beta?" you have struck gold. Actual validation is when they ask about the price or the timeline.
Defining Your Narrow MVP
Scope creep kills more side projects than technical debt. Because you can build anything, you often try to build everything.
For your MVP (Minimum Viable Product), you must be ruthlessly reductionist. We are building a "Skateboard," not a Ferrari. A Skateboard gets the user from A to B; it just isn't fancy. A Ferrari engine block without wheels (a half-finished complex app) gets them nowhere.
Your MVP spec must fit on a single index card. It should define:
- The Trigger: What specific Slash Command or Event triggers the bot? (e.g.,
/incident start) - The Action: What one thing does the bot do? (e.g., Creates a Jira ticket and a dedicated Slack channel).
- The Outcome: What is the success state? (e.g., The incident channel exists with the right people invited).
The "One-Feature" Rule: If your bot does incident management, it does not need analytics dashboards, PDF exports, or complex user permissioning yet. It only needs to manage the incident.
Important: Your first version will likely lack a web dashboard entirely. Configuration can happen via Slack commands or a simple JSON config file. This saves you 50% of the initial development time, allowing you to launch in weeks, not months.
The Pricing Hypothesis
Before you write a line of code, you must decide on a price. Many developers default to "Free" or "$5/month" because they undervalue their own work.
Do not charge $5.
- $5 signals "toy app" to a manager.
- $49 signals "business tool."
If your tool saves a team of 5 developers just 1 hour each per month, that is roughly $500 of value saved (assuming a $100/hr loaded cost). Charging $49/month is a 10x ROI for the buyer.
Your Homework for Day 7: Draft a simple Google Doc "Sales Sheet." It should have:
- Headline: The one painful problem you solve.
- The Solution: One paragraph on how the bot fixes it.
- Pricing: One simple tier (e.g., $29/mo flat or $49/mo per team).
Send this to the 2-3 people from your interviews who seemed most interested. If one of them replies, "Sounds fair, let me know when it's live," you are ready to build.
Moving Forward
By the end of this week, you might feel like you haven't "done" anything because you haven't committed code. In reality, you have done the hardest work of all: you have identified a market gap that is shaped like a credit card slot.
Now that you have a clear spec and a validated customer, you can stop guessing and start engineering.
Coming up in Section 2: You will break ground on the technical foundation. You will learn how to set up a serverless architecture that scales from $0, implement the Slack OAuth flow correctly (without reading the entire 80-page spec), and deploy your "Hello World" to a live production environment. No more local tunneling--you are going live.
Section 2: Define Positioning, Pricing, and the Offer (Days 8-12)
You will turn your validated problem into a concrete product promise, simple packaging, and price points that fit B2B buyers. You will write landing page copy and onboarding messaging that matches how teams evaluate tools: outcomes, security, and time savings.
Learning Outcomes:
- Write a positioning statement: who it's for, what it does, and why it's different
- Choose an initial pricing model ($49-$299/month) and package by team size or feature gates
- Create a one-page spec for your offer: features, limits, SLA/support expectations, and upgrade path
You have spent the first week (Days 1-7) identifying a painful problem and confirming that real humans actually want it solved. If you followed the instructions in Section 1, you should have a handful of validated conversations and perhaps a waiting list of interested users.
The temptation right now is overwhelming: you want to open your IDE, spin up a new repo, and start coding the solution immediately.
Stop.
Before you write a single line of Python or Go, you need to define exactly what you are selling, who you are selling it to, and how much you are charging. In the world of B2B Slack bots, vague products die. Products that try to be "for everyone" end up being for no one.
In this section (Days 8-12), we are going to wrap your validated problem in a business model. We will turn a raw idea into a "shippable offer."

The Positioning Statement: Your North Star
Most developers struggle with positioning because we tend to describe how things work rather than what they do. We say, "It's a Node.js bot that uses the OpenAI API to parse text strings," when the buyer needs to hear, "It's an automated support assistant that cuts ticket resolution time by 50%."
For Days 8-9, your goal is to write a positioning statement that acts as a filter for every feature you decide to build (or cut). If a feature doesn't support this statement, it doesn't make the MVP (Minimum Viable Product).
We will use a modified Crossing the Chasm framework specifically for B2B tools:
The B2B Positioning Formula
For [Target Audience] Who [Statement of the Need or Opportunity] The [Product Name] is a [Product Category] That [Key Benefit / Compelling Reason to Buy] Unlike [Primary Alternative/Competitor] Our Product [Primary Differentiation]
Example: A Standup Bot
- For remote engineering managers
- Who struggle to keep track of what their distributed team is working on
- The DailySync Bot is a team accountability tool
- That automatically collects and summarizes daily updates inside Slack
- Unlike holding a 30-minute Zoom call every morning
- Our Product is asynchronous and integrates directly with Jira tickets to track progress.
Notice the difference? The "Alternative" isn't necessarily another bot; often, your biggest competitor is a spreadsheet, a Zoom call, or a manual process.
Pricing Models: The "Expense Account" Sweet Spot
On Day 10, you will choose your pricing. This is where many indie hackers self-sabotage by charging $5/month.
Do not charge $5/month for a B2B tool.
If you are selling to businesses, you are selling value, time savings, and reliability. A $5 price tag signals "hobby project that might disappear next month." Furthermore, you need 1,000 customers at $5/mo to hit a $5K MRR goal. You only need 50 customers at $99/mo to hit that same goal. Support volume for 50 customers is manageable alongside a full-time job; support volume for 1,000 customers is not.
We are targeting the "Manager's Expense Card" tier. This is generally between $49 and $299 per month. At this price point, a mid-level manager can usually authorize the purchase on a corporate credit card without needing approval from a CFO or procurement department.
Choosing Your Pricing Structure
| Model | Description | Pros | Cons | Recommendation |
|---|---|---|---|---|
| Flat Rate | One price for the whole workspace (e.g., $49/mo). | Easiest to build. Predictable revenue. Frictionless for buyers. | Leaves money on the table for large teams. | Best for MVP launch. |
| Per Seat | Price per active user (e.g., $5/user/mo). | Scales perfectly with customer growth. High upside. | High friction. Buyers hate calculating costs. Harder to implement billing logic. | Avoid for MVP unless critical. |
| Usage Based | Price per action (e.g., $0.01 per request). | Fair alignment of value to cost. | Unpredictable for you and the buyer. | Only use if your API costs are high (e.g., AI tokens). |
| Tiered | Small, Medium, Large packages. | Anchoring effect helps upsell. Captures different segments. | Increases decision fatigue for buyers. | Introduce in v2. |
Pro Tip: For your initial launch, stick to a simple Flat Rate or a simple Tiered model (e.g., "Standard" at $49 and "Pro" at $149). This simplifies your Stripe integration code significantly, which we will tackle in Section 4.
The Offer: Defining the MVP Spec
Days 11-12 are about scope management. You have limited time--likely 10-15 hours a week outside your day job. You cannot build a "complete" SaaS platform in 45 days. You need to build a "Specific Offer."
Your Offer Spec is a one-page document that defines exactly what the customer gets. This prevents "scope creep," where you spend three weeks building a settings dashboard that nobody visits.
Your Offer Spec must include:
- The Core Mechanism: The single workflow that solves the problem. (e.g., "Slash command
/standuptriggers a modal, inputs are posted to#general"). - The Constraints: What are the limits? (e.g., "Up to 50 users per workspace," "7-day history retention").
- The Support SLA: Be clear about this. You are a solo founder with a job. (e.g., "Email support with 24-hour response time").
- The Onboarding: How do they get value in the first 5 minutes? (e.g., "One-click install, DM to admin with setup instructions").
Why define limits now? If you define a limit of "7-day history retention" for your base tier, you don't just save database costs; you create an immediate reason for a customer to upgrade to a higher tier later. You are engineering the upgrade path before writing the code.
Copywriting: Security and Outcomes
When writing the copy for your landing page (which we will deploy in the next section), remember that B2B buyers scan for specific triggers. They are risk-averse.
Your copy needs to address three specific psychological hurdles:
- "Will this actually save time?"
- Bad Copy: "Easy to use interface."
- Good Copy: "Replaces your 30-minute daily meeting with a 2-minute async check-in."
- "Is this secure?" (Crucial for Slack apps)
- Even if you aren't SOC2 compliant yet, you must address data handling.
- Copy to include: "We use bank-grade encryption. We only request permission to read messages in channels where the bot is explicitly invited. We never read your DMs."
- "Can I trust you?"
- Since you don't have logos yet, you borrow trust through transparency. "Built by a developer for developers. Hosted on AWS. 99.9% Uptime Goal."
Key Insight: In the B2B space, "Boring is Good." Buyers don't want "revolutionary" when it comes to their infrastructure; they want "reliable." Use clear, professional language. Avoid slang or overly casual tones in your pricing and security sections.
Looking Ahead: How This Foundations Your Build
The decisions you make in this section are not just marketing fluff; they directly dictate the code you will write in the coming weeks. By deciding on a flat-rate price, you simplify your Stripe webhook handlers. By defining a "7-day history" limit, you define your database cron jobs.
What You'll Build On
- In Section 3 (Tech Stack & Architecture): We will select the exact database and hosting setup that supports the security promises you made in your positioning.
- In Section 4 (The Build): We will implement the specific Stripe checkout flow that matches the pricing tiers you selected here, avoiding complex logic for features you aren't charging for yet.
- In Section 6 (Launch & Sales): The "Positioning Statement" you wrote above will become the subject line of your cold emails and the headline of your Product Hunt launch.
You now have a validated problem, a target price point, and a defined spec. You have stripped away the ambiguity that usually kills side projects. You are no longer "playing around" with an idea; you are executing a spec.
In the remaining sections of this course, we stop planning and start building. We will cover the specific boilerplate to handle Slack's OAuth (so you don't have to read their confusing docs), set up your serverless infrastructure, and eventually, execute the marketing plan that gets those first 10 credit cards on file.
Get your specs written. Next week, we deploy.
Course Details
- Sections8 sections
- Price$9.99