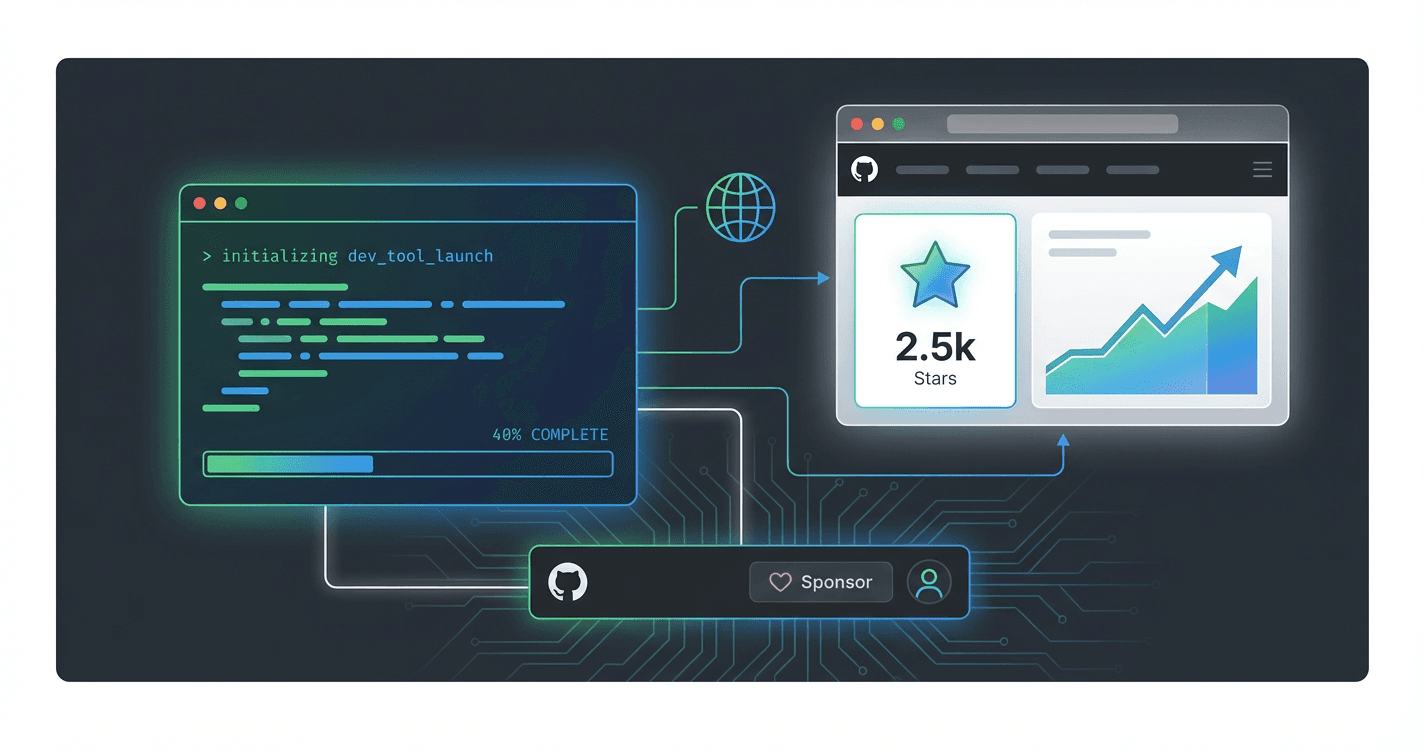
From Zero to Viral Dev Tool: Build a GitHub Star Magnet in 6 Weeks
Build and ship an open-source developer tool that people actually install, share, and star in just 6 weeks. You'll go from "I don't know what to build" to a polished CLI or VS Code extension with a conversion-optimized README, a repeatable distribution plan, and a coordinated launch across GitHub, Hacker News, Product Hunt, and developer communities.
Your code is solid, but your GitHub profile is a graveyard of repos with single-digit stars while developers half as skilled are landing six-figure offers because 50,000 people know their name. The difference isn't talent--it's knowing exactly which tool to build, how to position it, and where to launch it so the right people can't help but pay attention. In six weeks, you'll go from invisible builder to recognized creator with a developer tool that actually gets used, shared, and remembered.
What Students Say
Hear from learners who have completed this course:
Tomás R.
Platform Engineer (DevEx), Fintech Startup
I came in with a half-baked idea for a CLI, but Section 1 (Virality Equation) forced me to pick a sharper problem: reducing "it works on my machine" drift in local env setup. The repo research in Section 2 was the biggest unlock—using the course’s star/issue patterns and README scan method, I found exactly where existing tools were failing newcomers. I shipped an MVP CLI in Week 3 and followed the “polished first run” checklist (sane defaults, helpful error messages, and a guided init flow). After rewriting my README using Section 5’s positioning + proof structure (screenshots, quickstart, and a crisp ‘why this exists’), our install-to-star rate noticeably jumped. Launch Week (Section 7) was surreal: my Hacker News post hit the front page for a few hours and we went from ~40 stars to 1,400+ in six days. The best part is that it’s now helping my team too—we use the launch playbook internally for every dev tool we open-source.
Read more
Adaeze O.
Senior Data Scientist, Healthcare Analytics
I’m not a “developer tools person,” so I was nervous, but the course made it concrete. I built a VS Code extension that surfaces dataset schema hints and common feature-engineering checks inline. Section 3’s build-fast approach kept me from overengineering, and Section 4’s “demo-first” guidance pushed me to prioritize perceived speed, a clean empty-state, and trust signals like clearly-scoped permissions and telemetry disclosure. The biggest career impact came from Section 6 (build in public without feeling sleazy): I started posting short progress threads with before/after GIFs and the exact problems I was solving, and people actually replied with edge cases. By launch week, I already had 12 beta users, and after following the Product Hunt + community coordination checklist in Section 7, the extension reached ~3,200 installs in the first month. I used the momentum in Section 8 to set up a lightweight maintenance loop (issue templates + monthly roadmap), and it’s now part of my performance review as a cross-team impact project.
Read more
Fatima A.
Developer Advocate, Cloud Infrastructure Company
I’ve helped other people launch, but I’d never shipped my own OSS tool end-to-end. The course’s Section 2 repo research method (especially comparing open issues to README promises) helped me spot an underserved niche: a small CLI that generates minimal, provider-agnostic runbooks from Terraform plans. Section 5’s README framework was the missing piece—my first README was basically a changelog; the course made me rewrite it around a clear job-to-be-done, a 30-second quickstart, and proof (real output samples + compatibility matrix). I also adopted the “distribution system” from Section 6: weekly tiny releases, a predictable changelog, and a simple ‘request a template’ form that didn’t feel spammy. When I ran the coordinated launch in Section 7, I didn’t burn out because I had assets ready (demo GIF, short pitch variants, and community-specific posts). The result: 2,000+ GitHub stars in three weeks, plus I was invited to speak at two community meetups—something that directly helped my work as a DevRel lead.
Read more
Course Overview
Build and ship an open-source developer tool that people actually install, share, and star in just 6 weeks. You'll go from "I don't know what to build" to a polished CLI or VS Code extension with a conversion-optimized README, a repeatable distribution plan, and a coordinated launch across GitHub, Hacker News, Product Hunt, and developer communities.
Section 1: The Virality Equation and Choosing the Right Problem
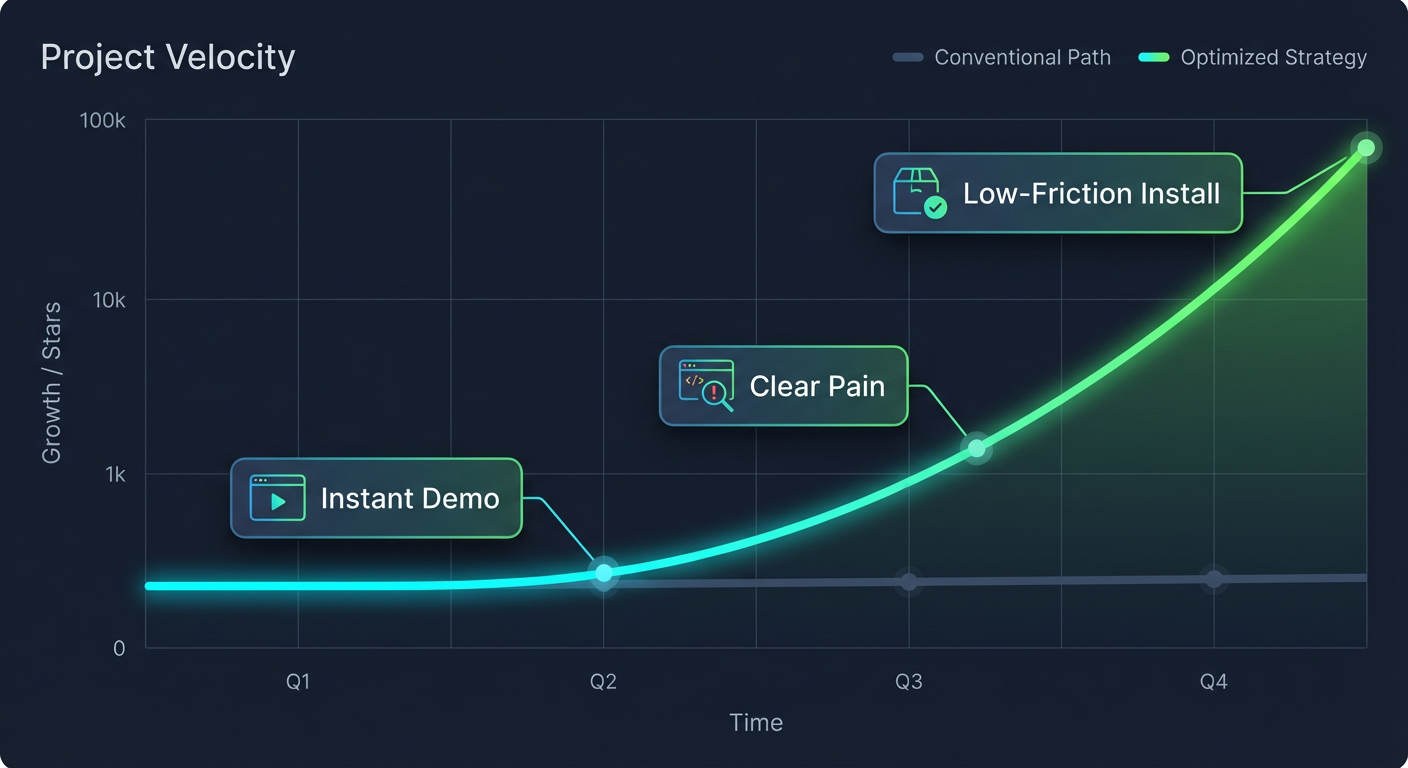
You'll learn how viral dev tools win: clear pain, instant demo, low-friction install, and a tight promise. Then you'll validate a problem worth building by analyzing real repos, star curves, and distribution channels before writing a one-sentence positioning statement.
Learning Outcomes:
- Identify the highest-leverage "star drivers" for dev tools (time saved, clarity gained, risk reduced, workflow automation).
- Apply a scoring framework to pick a problem that is demo-able, narrowly scoped, and shareable within 6 weeks.
- Produce a validated tool thesis: target user, use case, promise, and a measurable success metric.
You have likely experienced the "GitHub Ghost Town." You spend weekends crafting a clever utility or a beautiful library. You clean up the code, write a decent commit message, push to main, and share the link on Twitter or Reddit.
Then... silence. Maybe a bot likes the tweet. Maybe a colleague gives it a pity star. But the traffic flatlines, and the repository collects digital dust. Meanwhile, you watch a "weekend project" with objectively worse code hit the front page of Hacker News and gather 2,000 stars in 48 hours.
What happened? It wasn't luck. The difference between a ghost town and a star magnet is rarely code quality--it is problem selection and virality engineering.
In this section, we are moving away from the "build it and they will come" fallacy. Instead, we will reverse-engineer how developer tools gain traction by using the Virality Equation.
The Virality Equation
Most developers treat marketing as an afterthought to be applied after the code is written. Viral tools, however, have marketing baked into their architecture. To understand this, we use a conceptual formula that determines the likelihood of a tool taking off.
Key Insight: Virality is a function of how quickly you can deliver a "dopamine hit" relative to the effort required to install your tool. If the friction outweighs the immediate value, your user churns before they even run the first command.
The Variables:
- Clear Pain: The problem must be obvious, annoying, and frequent.
- Instant Demo: The "Time to Dopamine" (TTD) must be measured in seconds, not minutes.
- Low Friction: Every config step, every flag, and every prerequisite reduces conversion by 50%.
- Tight Promise: A specific solution for a specific developer, not a "general-purpose toolkit."
Your goal in this course is to manipulate these variables. We want to maximize the numerator (Pain + Demo) and aggressively minimize the denominator (Friction).
Identifying Star Drivers
Why do developers star repositories? It is rarely to "bookmark for later." A star is a signal of identity ("I use cool tools") or a thank you for solving a headache. To pick a winning problem, you must target one of the four primary Star Drivers.
| Star Driver | The Psychological Trigger | Example |
|---|---|---|
| Time Saved | "I hate writing this boilerplate code over and over." | Tailwind CSS, Shadcn UI |
| Clarity Gained | "I finally understand what is happening in my system." | Bundle analyzers, Logger prettifiers |
| Risk Reduced | "This stops me from breaking production/looking stupid." | Zod, TypeScript, Linters |
| Workflow Automation | "A robot should be doing this boring task." | Dependabot, Husky |
Pro Tip: The highest-leverage category for solo developers is usually Clarity Gained or Workflow Automation. These allow you to build small, scoped tools that have immediate visual impact--perfect for screenshots and GIFs.
The Problem Scoring Framework
The biggest mistake ambitious developers make is over-scoping. You have 6 weeks. You cannot build the next Vercel or Supabase. You need a "wedge"--a sharp, narrow tool that solves one specific problem incredibly well.
Use this scoring framework to evaluate your ideas. Rate each idea on a scale of 1-5. If the total is under 15, kill the idea.
1. Demo-ability (Score 1-5):
- 5: Can be demonstrated in a single GIF or a 10-second CLI recording.
- 1: Requires the user to integrate a library, rebuild their app, and deploy to see results.
2. Pain Frequency (Score 1-5):
- 5: The user encounters this problem multiple times a day (e.g., git conflicts, JSON formatting).
- 1: The user encounters this once a year (e.g., project scaffolding).
3. Integration Friction (Score 1-5):
- 5: Zero config.
npx run your-tooland it works. - 1: Requires database migrations, API keys, and complex config files.
4. Shareability (Score 1-5):
- 5: The output looks cool/interesting enough to screenshot and post on Twitter.
- 1: The output is silent or invisible (e.g., a background optimization library).
Validating Your Thesis with "Repo Forensics"
Before writing a single line of code, we need to validate that the problem actually exists. Don't ask your friends; their feedback is biased. Look at the data.
Step 1: The "Alternatives" Search Search GitHub or npm for tools that try to solve your problem.
- If you find zero tools, be careful. The problem might not exist.
- If you find huge tools (e.g., "I'm building a React alternative"), stop. You can't compete on distribution yet.
- The Sweet Spot: You find tools with 200-1,000 stars that haven't been updated in 2 years, or have terrible documentation. This proves the demand exists, but the supply is outdated or poor.
Step 2: Issue Tracker Archaeology Go to the repositories of major tools in your space (e.g., Next.js, VS Code, Docker). Click on the "Issues" tab. Look for closed issues labeled "wontfix" or "out of scope."
- These are gold mines. Users are begging for a feature, and the maintainers said "no" because it didn't fit their roadmap. That feature is your product.
Important: You do not need a unique idea. You need a unique angle.
rimraf(the UNIX commandrm -rffor Node) has 50M+ weekly downloads. It just deletes files. It won because it solved a cross-platform friction point for Windows users, not because the idea of deleting files was novel.
The Deliverable: Your One-Sentence Position
By the end of this week, you must crystallize your idea into a Positioning Statement. This prevents feature creep and gives you a clear "North Star" for your marketing.
The Template:
[Tool Name] helps [Target User] achieve [Measurable Outcome] by [Core Mechanism], unlike [Current Alternative] which requires [Specific Pain].
Example:
- Bad: "My tool is a CLI for managing databases better."
- Good: "Migrate-Easy helps Node.js backend devs visualize schema changes instantly by generating SQL diagrams from Prisma files, unlike raw SQL clients which require mentally parsing complex table relationships."
Summary and Next Steps
You now understand that virality is engineered through high pain, low friction, and instant demos. You have identified a Star Driver, scored your ideas to ensure they fit the 6-week timeline, and validated the problem using repo forensics.
You are no longer guessing; you are executing on a validated thesis.
Coming up in Section 2: Now that we have the problem, we need to build the solution--but not in the way you are used to. In "The MVP Sprint: README-Driven Development," we will write the documentation before the code. You will learn how to design your API for marketing first, ensuring that when you do launch, your "Time to Dopamine" is nearly instant.
Section 2: Market and Repo Research That Predicts Stars
You'll reverse-engineer successful and failed tools to understand why some repos convert browsers into users and stargazers. You'll map competitors, find gaps in positioning and UX, and generate a feature set that is minimal but differentiated.
Learning Outcomes:
- Build a "competitive README tear-down" to extract naming, messaging, structure, and proof patterns that drive conversion.
- Spot underserved niches and avoid oversaturated ideas by analyzing keywords, GitHub search, and community chatter.
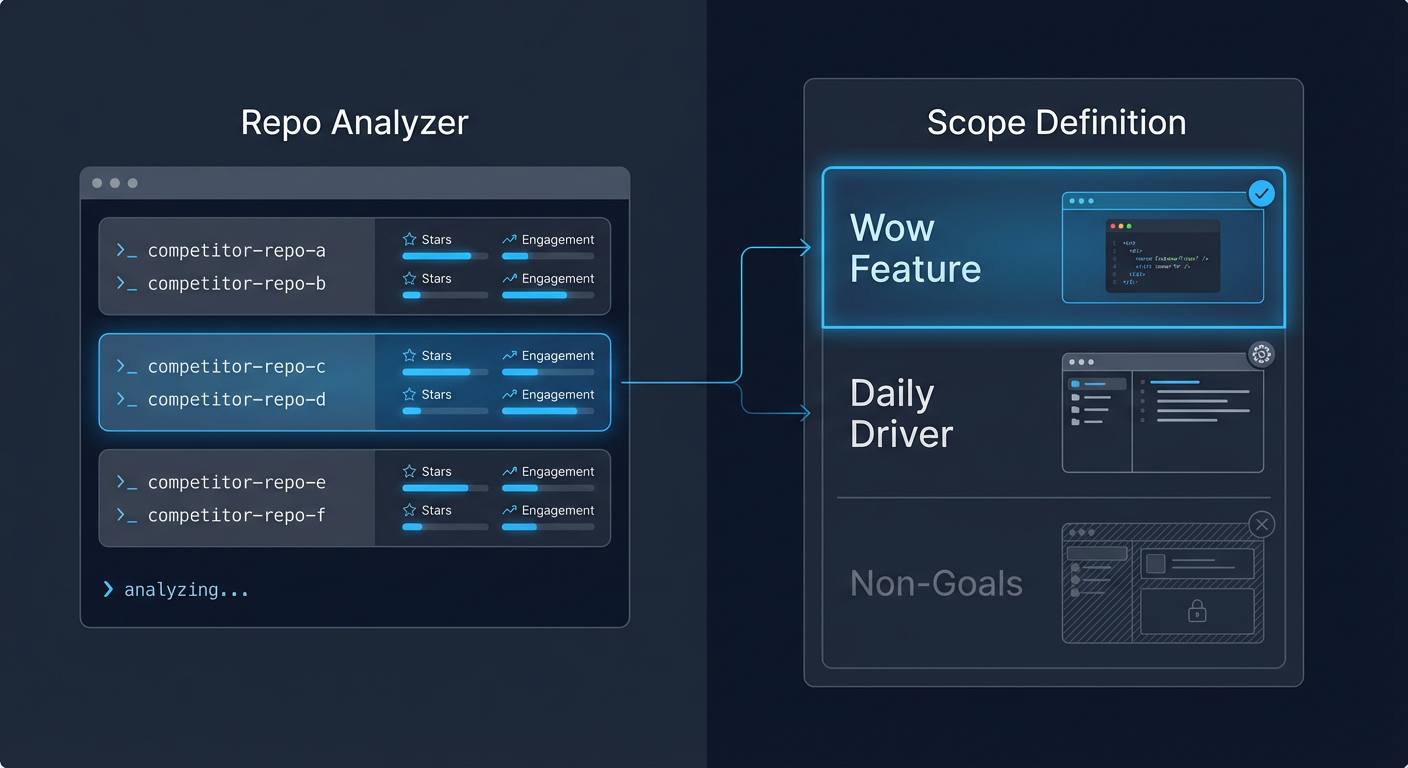
- Define a tight MVP scope with one "wow" feature, one "daily driver" feature, and a clear non-goal list.
Most developers approach a new side project with a "code-first" mentality. You have an idea, you spin up a repo, and you immediately start obsessing over the architecture, the tech stack, and the linting rules. Three weeks later, you have a beautiful, clean codebase that solves a problem nobody actually cares about, described in a README that nobody reads.
In Section 1, we focused on selecting a problem space with viral potential. Now, we need to ensure your specific solution fits into that market before you write a single line of feature code.
This phase is not about traditional marketing surveys; it is about forensic analysis of existing GitHub repositories. By reverse-engineering the successes and failures of tools currently in your niche, you can predict what will generate stars and what will be ignored.
The Competitive README Tear-Down
Your first step is to stop looking at your competitors' source code and start looking at their "storefront." In the open-source world, the README is your landing page, your sales deck, and your demo.
When you analyze a successful repository (one with 1k+ stars) or a failed one (stagnated at <50 stars despite being old), you are looking for specific patterns in how they communicate value. We call this the Competitive README Tear-Down.
To perform a tear-down, identify 3-5 tools similar to your idea. For each, extract the following elements:
- The Hook (H1 + Tagline): Does it describe what it is or what it does for you? Successful tools almost always focus on the benefit (e.g., "Blazing fast builds") rather than the implementation (e.g., "A Webpack wrapper written in Rust").
- The "Magical Moment": How quickly do they show code? Look for the first code block or GIF. If it takes three scrolls to see how the tool works, mark that as a UX gap you can exploit.
- The Proof: Do they use badges, testimonial quotes, or "used by" logos?
- The Friction: Run their
npm installorbrew install. Does it actually work? A "successful" repo with broken installation instructions is a prime target for disruption.
Key Insight: Many high-star repositories are "zombies"--popular years ago but now unmaintained. If you find a repo with 5k stars but the last commit was 2 years ago and the Issues tab is full of unanswered complaints, you have found a gold mine. You don't need a new idea; you just need to be the modern, maintained alternative.
Spotting the Gap: Keywords and Community Chatter
Once you have analyzed the competitors, you need to find your specific angle. You want to avoid the "Red Ocean" (oversaturated markets where you are just noise) and find the "Blue Ocean" (underserved niches).
You do this by analyzing keywords and community sentiment. Go to Hacker News, Reddit (r/webdev, r/programming), and Twitter/X. Search for the names of the tools you identified in your tear-down.
Use the following framework to categorize what you find:
| Signal Type | Observation | Verdict |
|---|---|---|
| The Ghost Town | You search for a problem and find zero repos, zero questions on StackOverflow, and no tweets. | AVOID. If nobody is asking, nobody is looking. You are likely solving a problem that doesn't exist. |
| The War Zone | Thousands of results. "Yet another React State Manager." Debate is fierce and tribal. | AVOID (unless you have a massive existing audience). It is too hard to be heard above the noise. |
| The "But..." | "I use Tool X, but it's too heavy." "I like Tool Y, but the config is a nightmare." | BUILD HERE. The "But" is your roadmap. You aren't inventing a new category; you are fixing the fatal flaw of the leader. |
Pro Tip: Look specifically at the "Closed" issues in your competitors' GitHub repos. Often, maintainers will close feature requests with "Out of scope" or "Wontfix." If you see the same "Wontfix" request popping up repeatedly from different users, that is your Core Differentiator.
Defining the MVP: The "Wow" and The "Daily Driver"
The biggest killer of side projects is scope creep. To launch in 6 weeks, you cannot build a "complete" product. You need a Minimum Viable Product (MVP) that feels complete enough to star.
To do this, we use a strict scoping framework. Your initial version must have exactly three components:
1. The "Wow" Feature (The Hook)
This is the feature that looks good in a GIF. It is the reason someone clicks "Star" or retweets your launch post. It might not be the most important feature utility-wise, but it has high visual or emotional impact.
- Example: For a CLI tool, this might be a beautiful, interactive dashboard output rather than just text logs.
2. The "Daily Driver" Feature (The Retention)
This is the boring utility that actually solves the problem reliably enough for a user to keep the tool installed.
- Example: Robust error handling and speed. It doesn't look cool, but if it fails, they uninstall.
3. The Non-Goals (The Scope Saver)
You must explicitly list what you are not building. This prevents you from going down rabbit holes.
Example Scope for a "Localhost API Mocking Tool":
- Wow Feature: A TUI (Text User Interface) that visualizes incoming requests in real-time with color-coded status codes.
- Daily Driver: It parses standard OpenAPI/Swagger files to auto-generate mocks without config.
- Non-Goal: A web UI, cloud synchronization, team sharing features, or support for obscure protocols like SOAP.
By strictly defining these boundaries, you ensure that you spend your limited development time on the things that actually drive conversion (stars) and retention (usage).
From Research to Architecture
With your research complete, you now have a clear blueprint. You know who you are fighting (the Zombie repos), exactly what gap you are filling (the "But..." complaints), and exactly what features you are building (Wow + Daily Driver).
This clarity cures "Blank Editor Syndrome." You aren't wondering what to code; you are simply executing a plan that has market validation baked in.
What You'll Build On
The research you did here acts as the foundation for the rest of the course:
- In Section 3 (Architecture & Building): We will implement the "Wow" feature using specific libraries that maximize visual impact with minimal code.
- In Section 4 (The Perfect README): You will use your "Competitor Tear-Down" notes to write copy that specifically targets the weaknesses of the current market leaders.
- In Section 5 (The Launch): Your "Gap Analysis" tells us exactly where to post your launch (e.g., replying to those specific "But..." threads on Reddit).
Ready to Build?
You now have a validated idea and a tight scope. In the full course, we take this blueprint and move into execution mode. We stop planning and start shipping. We will cover how to structure your codebase for open-source contribution, how to automate your documentation, and how to orchestrate a launch that gets you into the GitHub Trending tab.
The difference between a side project that gathers dust and one that launches a career isn't usually code quality--it's preparation. You have done the prep. Now let's build the star magnet.
Course Details
- Sections8 sections
- Price$9.99